Refinishing kitchen or bathroom cabinets to give them a modern, updated appearance without having to replace them entirely is known as cabinet painting. This reasonably priced option can completely change the look of a room, giving it a contemporary style and enhancing its functionality and durability. In addition to improving the overall décor, properly painted cabinets extend the life of the wood by shielding it from stains, moisture, and wear and tear.
What We Do
The Process to a Flawless Cabinet Painting
01
Initial Assessment and Planning
Start by giving the cabinets a thorough inspection to find any places that require repair or maintenance. With the homeowner, go over color selections and finishes, as well as the kind of paint to be applied (latex, oil-based, or chalk paint, for example). Make a strategy that outlines the resources and deadlines required for the project.
02
Preparation
To achieve a smooth painting surface, remove all cabinet doors, drawers, and hardware (handles, knobs, etc.). Mark every part so that reassembly is easier in the future. Clean the surfaces thoroughly to eliminate grease, debris, and dust, which can hamper paint adhesion.
03
Repairing Surfaces
Examine the cabinet surfaces for any dents or scratches, then use putty or wood filler to fix any damage found. Sand the surfaces, paying attention to any rough edges or flaws, to provide a smooth canvas on which to paint. In order to achieve a professional finish, this step is essential.
04
Priming
To protect the wood and improve paint adhesion, use a primer made for the type of cabinet you’re painting. Priming is particularly crucial when painting over a dark hue or on cabinets that have previously been stained. Prior to proceeding to the following step, let the primer completely dry.
05
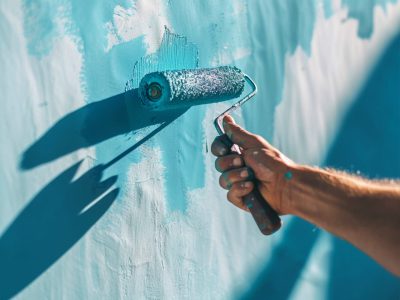
Painting
For more even coverage, start painting with a brush on smaller, more complex areas like corners and edges and finish with a roller or sprayer on larger surfaces. To prevent drips and guarantee a smooth finish, use thin coats. It might be necessary to apply many coats, giving sufficient drying time between applications, depending on the type of paint and desired hue.
06
Reassembly
Carefully reconnect the cabinet doors, drawers, and hardware once the last coat has dried. To get a polished appearance, make sure that every component is perfectly aligned and firmly fastened. This is a crucial stage for both appearance and functionality.
07
Finishing Touches
Examine the cabinets for any blemishes or areas that were overlooked, and do any necessary touch-ups. Make sure the cabinets are in good working order and clean any paint splatters from the surrounding regions. This last inspection contributes to a perfect finish.
08
Final Inspection
Make sure the job satisfies the homeowner’s expectations and that the cabinet painting is finished by conducting a final walkthrough. Talk about how to preserve the freshly painted cabinets through care and upkeep. This phase guarantees a long-lasting outcome and consumer happiness.
Testimonials
Clients Feedback and Reviews
I had the exterior of my home painted, and the difference is amazing. The crew was efficient, and the quality of the work was outstanding. I’ve already recommended [Company Name] to my friends and family!
John Doe
Manager
From start to finish, They provided excellent service. Their team was friendly and listened to my ideas. The end result was a beautiful space that feels brand new. Highly recommend their painting services!
John Doe
Manager
I’ve hired many painters in the past, but none as reliable and professional. Their attention to detail and dedication to getting it right was impressive. My office now looks fantastic!